Monday, December 31, 2012

Holiday Gifts

Mom asked me to knit a few Christmas gifts for her boyfriend's daughter and two granddaughters.  This request came a bit late, especially for knitted items, so I almost said no.  But you can't tell your mom no.  So I put a few other things aside and got out my needles.  To facilitate the process a little bit, I used yarn from my stash.


Crazy Wavy Colors Scarf

Thanks to Mom for this great styling...
The first item is a scarf for Mom's bf's 11 year old granddaugther.  I picked this colorful yarn from Jamie's Rainbow Yarn that I've used for several previous projects (here, here, and here).  The three skeins I bought cost more than I typically spend on yarn, but considering that I was able to get four projects out of it, I'm quite pleased.  Anywho, for this scarf I used this pattern (found on Ravelry), sans the little ring tassel things at the ends.  I think that the colors striped relatively nicely, at least on one end of the scarf.  On the other, they got a little clumpy.  Also, I wish I'd had a bit more yarn.  I was only able to do five rows, and while it looks wide and thick on the Cat in Hat, it's a bit narrower than I had hoped.  I think since the recipient is young and skinny it should be okay, though.

Honeydew Hand Warmers


For the older granddaughter, I made these hand warmers, posted just in time on Purl BeeI used Blue Sky Alpaca Worsted Cotton I also used to complete this cowl.  Mom had originally asked for three scarves (and two pairs of mittens, which I quickly nixed with only 4 weeks to Christmas).  I really wanted to use this yarn for this gift - it's so soft and nice to work with, and I love this Honeydew color - but I was having trouble finding a simple pattern that I could finish quickly and that I thought would look nice.  I was so excited when Purl posted this tutorial.  I went home and casted on that night!  For my first hand item, I'm very pleased with how these turned out.  It took a few rows for me to get used to using double pointed needles (I'm usually a magic loop kind of girl), but once I got my rhythm these practically knit themselves.

 
I actually made three hand warmers.  My original plan was to add two strips on the wrist using leftover yarn from my Chocolate Orange cowl, just for a bit of contrast, but I did not like the way it turned out. The colors looked good together, but the joins where I changed colors were awful.  I really need to practice that so it's not so noticeable.  (Does anyone have any tips??)    

Slouchy Cowl


My favorite by far is this Slouchy Cowl. I had originally bough this yarn to use for a project with the fancy yarn Mom bought me, but I decided I didn't like that project (still trying to come up with something), so I had a brand new skein just waiting to be used (of course, I can't remember what it is anymore and I threw out the label. I'll try to remember to check the next time I go to the yarn store).  I really like the way the wide cables form this lazy, slouchy look.  It's a good length too. It's tight enough to keep your neck warm, but not so tight that you feel strangled.  It was also relatively quick to knit up, though the width did add a little extra time.  I might even make one of these for myself, though there's a long list of other projects I'd have to finish first...

Thursday, December 27, 2012

Simply Quilt

Disclaimer: I apologize for the bad photos (and will until summer, most likely).  I finished this late at night and had to deliver it the next day, so there was not time for day shots. 

Here it is - my first-ever commissioned quilt!  My good friend Sabrina asked me to make a few gifts for some of her family members.  Apparently she's shown some of them my blog and they really like it (and might even check back semi-regularly...).

Anywho, this was a bit of a late request, so we decided to keep things simple and go with a (mostly) wholecloth quilt.  After scouring the interwebs, we narrowed it down to Simply Color Dotty Ombre from V & Co. in blue and Nature Elements in Ocean Breeze from Art Gallery.  Sab picked the dots.  I have to admit, I was pushing more for the nature elements.  I love the color and the pattern, and though the simply color is great too, I was nervous about making a primarily white quilt.  I'm still a little concerned about the white part - dirt is going to shine on this thing - but I have to say, I take back my hesitations otherwise.  I really like the wave effect of the pattern.  Also, the selvedges have a ready-made binding, so I didn't even have to worry about buying extra fabric for that.  So great!


For the back, I really wanted to use flannel.  This quilt is for Sab's grandmother, whom she mentioned gets cold easily, so I thought flannel would add a nice touch of warmth without making it too heavy.  I did some searches and couldn't find anything I liked or that I thought would work well with the front...until Black Friday.  Despite the fabric buying ban imposed on me by Mr. T until I use my entire stash, I couldn't help combing through the sales.  That is when I stumbled upon Greenhouse Flannel.  Not only was it a perfect fit with the front of the quilt, it was 50% off and an additional 25% with the Black Friday sales. What a steal!  Also, despite my ineptitude, it pieced together really well so the seams don't stand out too much (I can also thank the busy pattern for that).


By the time I got this thing basted, I only had one day to quilt and bind it before I had to deliver it (Sab was getting on a plane to India the next day to visit her family).  With so much white space, I had a really tough time deciding how to quilt it.  I knew from the beginning that I wanted to do very little quilting to keep it extra soft, but otherwise I had nothing.  At first I was thinking randomly spaced straight lines in blue and green thread, but that just didn't feel right.  The front feels so dynamic, and I worried that straight lines would detract from that movement.  So, with some trepidation, I grabbed my free motion quilting foot and consulted this tutorial by Elizabeth Hartman.  I've had my FMQ foot sitting around since September, but haven't had the nerve to try it out yet.  Well, I'm hooked!  It was so much fun!  Definitely difficult, but also fun.  I originally had grandiose plans of doing a swirly figure eightish design a la Denyse Schmidt, but after a few practice rounds I realized that was a bit too ambitious, especially with my tight deadline.  Instead, I did some simple wavy lines (thus, the name of this quilt - simple - which also ties into the name of the fabric).


The quilting is hard to see because I used white thread (by design. I don't need those uneven stitches standing out too much), but I like the overall effect.  It was a challenge wrangling the quilt through my tiny machine, and I have no idea how I'll ever quilt anything larger or with any sort of intricate, non-linear design, but it was a good first FMQ experience.  By the end there was a marked improvement in my stitch length and the evenness of my waves.  I even rearranged my sewing area a bit to better support the quilt (well, I just moved the chair and the machine to the short end of the table, but that's about all my limited space allows).


As mentioned above, I used the selvedges for the binding.  This was a hint too short, so I added a short strip from the yardage as well.  Then I machine bound it for a quicker finish.  It ended up being about 54x55, so a decent lap quilt, especially for Sab's petite grandmother.

Overall, I'm very pleased with this quilt.  The quilting is by no means perfect, but I'm happy with my first attempt.  And unless you study the stitches, it's not overly obvious. Now I just need to figure out the best way to add labels to my quilts.  Suggestions are more than welcome.

Tuesday, December 25, 2012

Linen Tote

I really love making bags.  I inevitably mess something up because I don't read the directions carefully and have to break out my seam ripper, which makes me angry, but it's still always fun and the end product turns out well.  Plus, after quilts and yarn-related projects that take forever, the (relatively) instant gratification is great!

Thanks to my model, Sabrina.

I made this bag using the Madras Tote pattern from Noodlehead.  As always, the pattern was great and easy to follow.  I did make a few changes.


I didn't have any cotton webbing on hand, so I used fabric to make the handles.  I did it just as Anna directed in the Sidekick Tote pattern, also adding interfacing to the lining fabric to stabilize it a bit more.


As is my habit, I also added a zippered pocket inside as well as a slip pocket.  I really can't handle a bag without an interior zip pocket.


The outer fabric is the same linen I used on the Sidekick Tote I made for Mom, and the interior is a Denyse Schmidt print from JoAnn.


Wednesday, December 19, 2012

Lucky Stars BOM


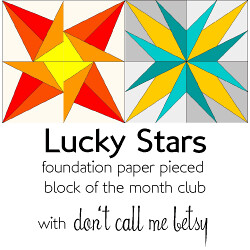
luckystarsbuttonwhiteI just signed up for the lucky stars block of the month club that Elizabeth at Don't Call Me Betsy is hosting.  I've never tried foundation paper piecing, so I'm excited.  This should be a good introduction, and I'll have a stellar quilt at the end (haha, no pun intended! It actually took me a few re-reads to realize there was a pun at all)

I'm also on a fabric buying ban, so it will be interesting to dig through my stash and see what I come up with...

Monday, December 17, 2012

More iPad cases

Apparently iPads and cases are all the rage this year.  After seeing the case I made Mom, three of my friends have asked me to make one for them/their family member.  So get ready to see a slew of cases over the next few weeks.  For the first batch, I made a slightly more simplified version than the one I made Mom, just leaving off the front zippered pocket.


These will be Christmas gifts for one of my good friend's aunts.  I can't decide which is my favorite...  The purple one is Leaves in Purple from Whistler Studio's Chelsea collection, paired with Kona Chartreuse.  The blue one is Stained Glass from Lanikai by Dear Stella, paired with Kona Navy and Coal (lining).

I really like making these cases.  They're super fun and quick, and are an easy way to add a dash of homemade to daily life.  I'm thinking about making one for my nook.  I also found a tutorial for quilted ones on Craft Buds, so I'm going to try that next.

Friday, December 14, 2012

iPad Case

This year we all chipped in a got Mom an iPad for her birthday and Hanukkah present.  Naturally, one needs a case for such a nice gift, so I made one and gave it to her for the first night of Hanukkah while Mr. T and I were visiting last weekend.  I used this tutorial from Faith at Fresh Lemons, which was great. (Sidenote: I did get a bit confused at the final stage when nesting the outside into the lining to join them.  There are a lot of layers to work with and I started sewing the outer cover closed.  Oops.  The directions are very clear; I was just hurrying along and not paying close enough attention.)  I used batting scraps that I had on hand for the padding.  I was thinking about using two layers for extra protection, but after assembling the entire case, one is definitely enough.  Two layers would have been combersome.  I also added interfacing (SF-101) to the lining pieces and the strap for some extra strength and durability.


I absolutely love the outer fabric.  It's Critter Community Trees in Retro by Suzy Ultman that I bought on a whim and it's become one of my favorites (you may recognize it from this earlier project).  I thought Mom would really like it too.  She loves going camping and bike riding, and her house is on a two-acre wooded plot where she enjoys bird, deer, and turkey watching.  (In fact, she woke me and Mr. T up at 8am Sunday morning screaming like a banshee because there were 30 turkeys and 6 deer in the yard.  We then proceeded to circle through every window in the house, upstairs and down, following them around the perimeter.  [I mock, but it always is pretty neat to see the wildlife so close, especially now that I live in a city]).


For the inside pocket, I used Joel Dewberry again.  I really love herringbone, and this color is great.  The color combination is reminiscent of the sky above the woods, without being super literal.  Plus it's called Pond, so it fits right in with the outdoorsy theme.


The owl and snail really get me.  So cute!  I just wish I hadn't sewn the owl upside down, though I do like that the tree in the center is right side up.  I thought the tree was more of the focal point, so the owl had to be inverted.  Oh well.  He's still cute.

Ahhh! That dastardly wrinkle! No matter how much I smoothed and ironed I could not get it to go away, or even move!

I've become better about adding my label to things too.  I admit I forgot on this until the entire thing was complete, so I only ironed it on and was not able to reinforce with stitching.  Hopefully it stays...

Mom was using the case all weekend, so I'll take that to mean she likes it.  Her boyfriend also got her one, though it's more like an iPad-specific purse than just a case.  She was using both together, so she'll have one well-protected iPad.

Thursday, December 13, 2012

Herringbone Coasters

Just a quick post today to show off the coasters I made my mom's boyfriend for Hanukkah.  I used Joel Dewberry's Modern Meadow Herringbone in Pond (LOVE!), with some Kona solids in coal, navy, and royal (the navy and royal are on the backs). 


Sorry, the photo is a bit blurry.  I forgot to take one before gifting these, so Mom's bf sent me one from his cellphone (Thanks!)
The last coaster I made I used one layer of batting and it seemed pretty thin, so this time I used two and I liked the end product much better.  I think Mom's boyfriend liked them as well.  As it happens, he was in the market for some coasters, so this was the perfect gift!


Wednesday, December 12, 2012

Pajama pants

Well, things are crazy around here!  Work is busy. Crafting is busy.  Life is busy.  Despite the radio silence here, I've actually been crafting like mad.  I just can't show most of it because it's all holiday gifts.  I do have two things I handed out to Mom and her boyfriend last weekend for Hanukkah, so I'll be sure to get those up in the next few days.  For now, here's something that I mentioned months ago and am finally ready to show.

PAJAMA PANTS!


I first mentioned these pants a few months ago when I was making the one's on the left for Mr. T.  I've since completed both his, which are now well worn, and a pair for myself!  This past weekend we were visiting Mom, so I made Mr. T bring his pants so we'd match and then had Mom take a few (bad) photos.  So simple and comfy!